
Remember the last time you bought something without comparing the price online? Or bought something only to realize it was available at a much better deal somewhere else?
Before buying a product or service, most customers will compare the prices and offers online or at least use Google to learn more about it.
Price comparison sites are the best way to check prices and know which website can give you the best deal. These sites collect information on the internet and display it in a single view, allowing customers to select the best stores to purchase their products. This enables the customers to get the best deal, and owning a successful price comparison site is a great way to create a long-term passive income stream.
Comparison sites help eCommerce merchants from not-so-well-known platforms attract new customers. In contrast, your customers benefit by getting a single-point comparison of a particular product price, helping them get the best deal in the market. And you get to benefit by catering to both. A win-win-win!
But given the features and technologies needed, building a price comparison website is not easy. This blog gives you a step-by-step guide on how to make a price comparison website using the ClipMyDeals WordPress Cashback Plugin and Theme and begin the journey toward becoming a successful online entrepreneur.
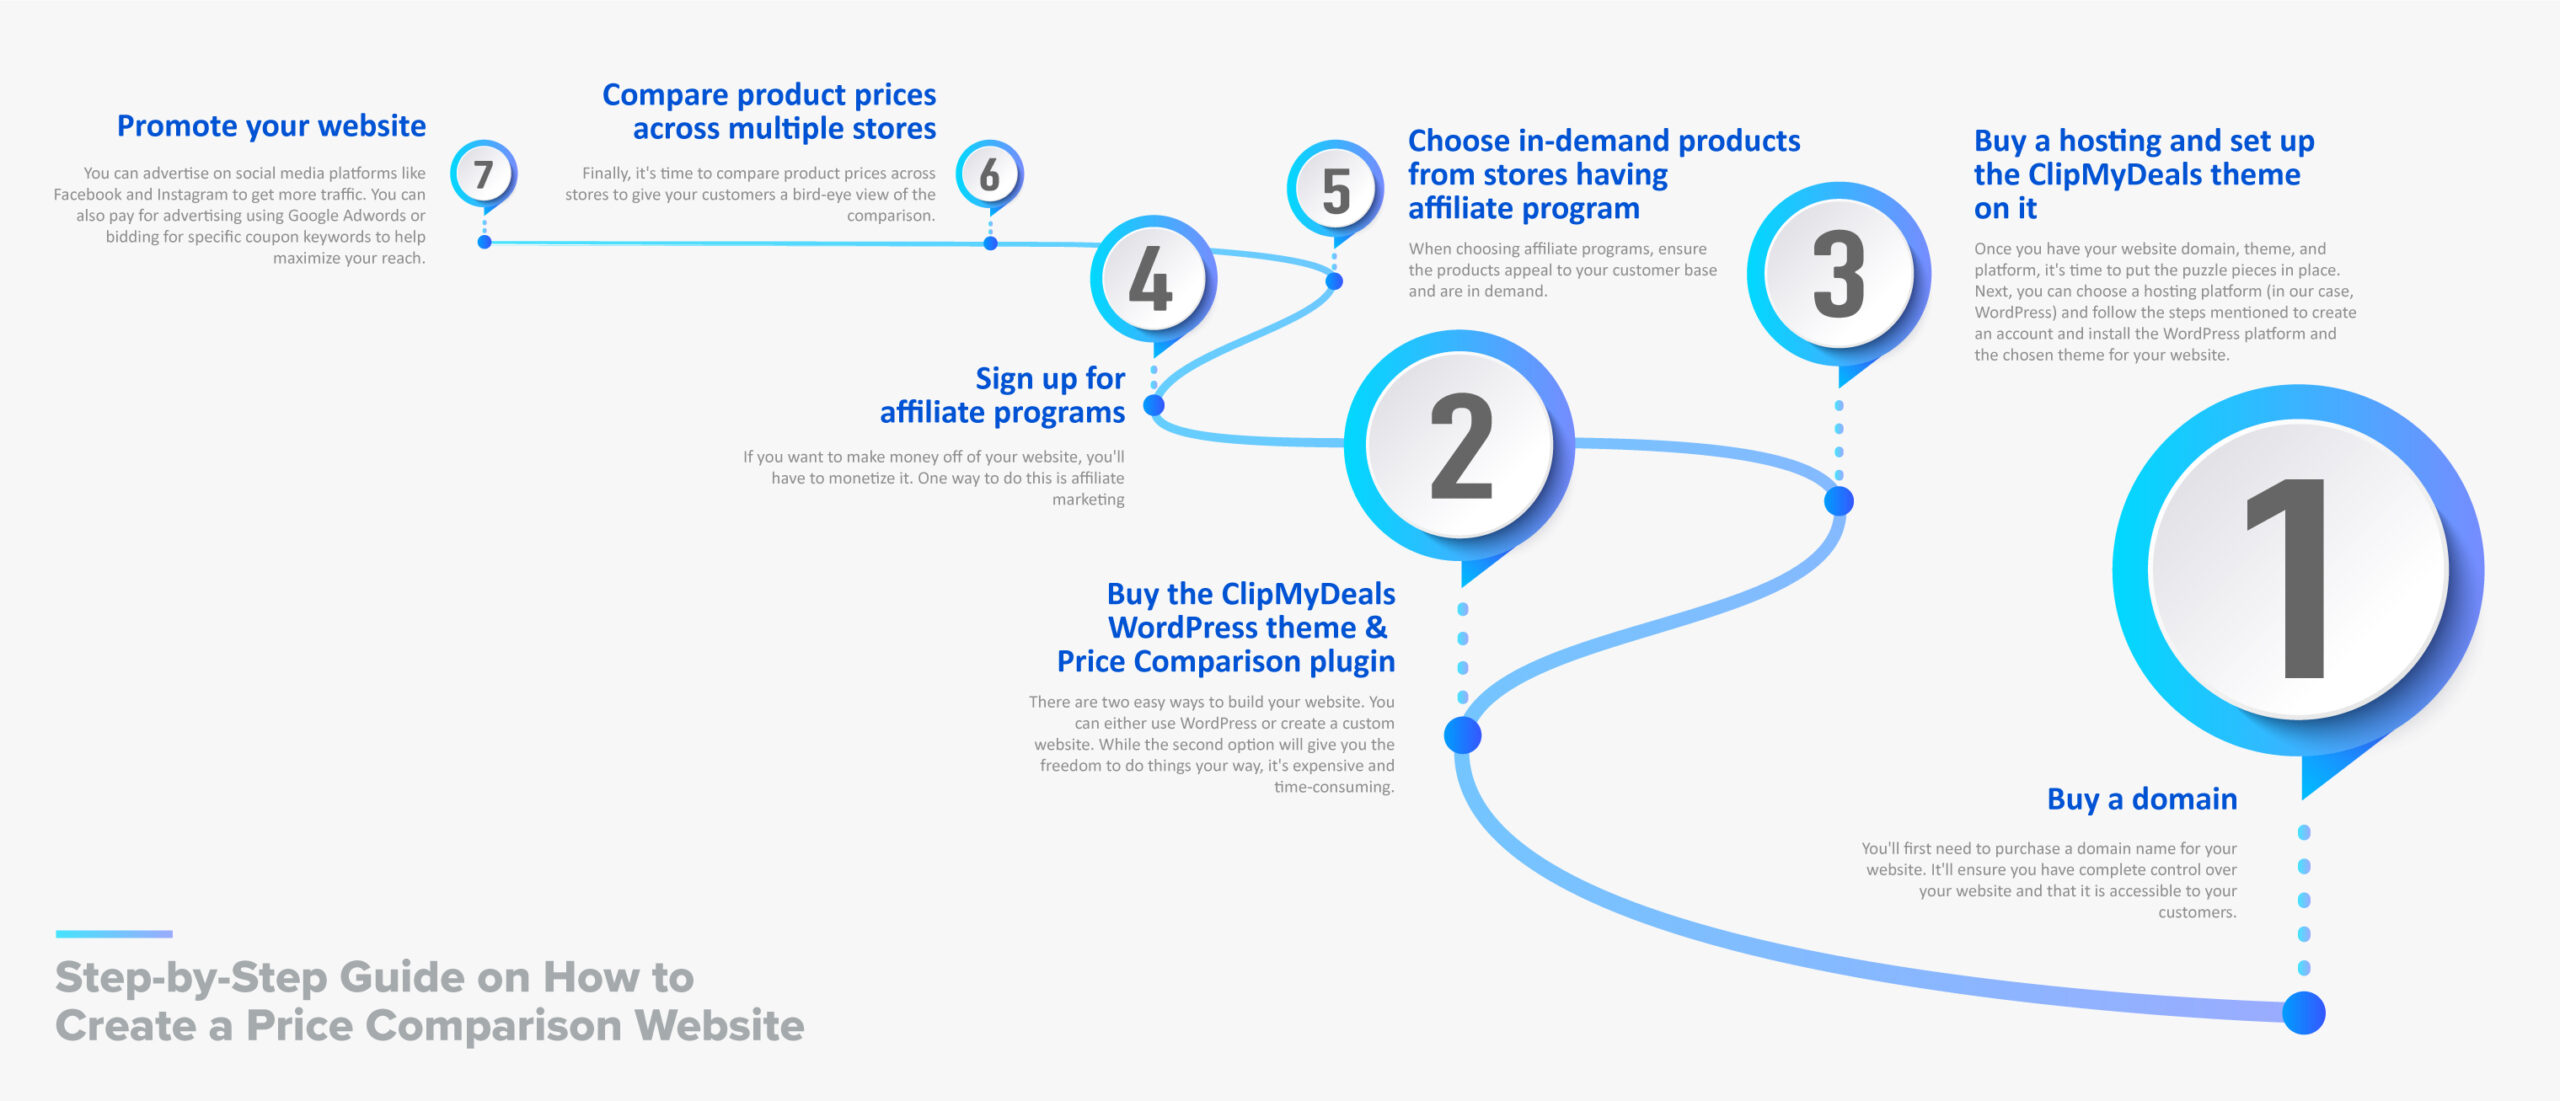
Step 1: Buy a domain
You’ll first need to purchase a domain name for your website. It’ll ensure you have complete control over your website and that it is accessible to your customers.
When choosing a domain name, ensure that:
- Your domain name matches the business name or the customers’ needs (in this case, you can use words like coupon or discounts feature in it)
- Get the proper extension: .com for a global website, .uk, o.ca, .de, .us, .in, and others for a local website.
- Don’t dwell too much on the name since most domain names are unavailable
- The trick is to choose an exciting name that you can market easily.
Step 2: Buy the ClipMyDeals WordPress theme and Price Comparison plugin
There are two easy ways to build your website. You can either use WordPress or create a custom website. While the second option will give you the freedom to do things your way, it’s expensive and time-consuming.
WordPress is an economical option and allows you to explore several themes and plugins. For building a price comparison website, your best option is the ClipMyDeals WordPress Theme.
Here are the benefits you can enjoy with this theme:
- The theme spoils you with choices as it offers 25+ different colors and designs. Moreover, it provides 9 fonts to choose from a simple drop-down menu. The best part is these options will help you create a professional-looking website.
- The customizer allows you to make the homepage as you see fit. You can easily add banners, sliders, or videos on the homepage. There is no need to copy-paste codes or play with widgets.
- The plugin is compatible with page builders and allows you to custom-make the header and footer of your website.
Additionally, ClipMyDeals has satisfactory customer service and usually resolves your tickets within hours. Further, you can also win freebies and get a free app for your website if you’re lucky.
Step 3: Buy a hosting and set up the ClipMyDeals theme on it
Now for the most exciting part!
Once you have your website domain, theme, and platform, it’s time to put the puzzle pieces in place. Next, you can choose a hosting platform (in our case, WordPress) and follow the steps mentioned to create an account and install the WordPress platform and the chosen theme for your website.
Next, here’s how you can set up the CipMyDeals Price Comparison theme:
- Go to WordPress and select ClipMyDeals Comparison.
- In the ‘Show Category list on Products,’ you can select either of these options:
- No Category: It will hide category tags from the product.
- Show only Parent Category: This option will show parent categories for your products.
- Show all Categories: It will show all categories and allow you to choose multiple tags for a single product.
- The next step is to select the ‘Show Store list on Products.’ You can choose from two options.
- Show All stores: It’ll display all the stores mapped to a particular product.
- No: It’ll hide all the stores mapped to that product.
- Next is the ‘Show Out of Stock Products.’ You can choose:
- Yes: It’ll showcase the products that are currently out of stock.
- No: Selecting this option will hide out-of-stock products.
- In the next step, you can choose to have a separate page for a product. For the ‘Show Single Product Page’ option, you can select ‘Yes’ to have a page or ‘No’ to not have a separate product page.
- Select the default currency and its position. You can choose Prefix to show the currency before the amount and Suffix to show it after the amount.
- Click on Save to make changes.
Step 4: Sign up for affiliate programs
If you want to make money off of your website, you’ll have to monetize it. One way to do this is affiliate marketing.
Affiliate marketing is the process of recommending products to your customers and making money online every time they proceed with a purchase. In this process, you’re the affiliate and help the product owner increase sales. For such sales, you earn a commission through a unique link or code associated with your recommendation.
You can become an affiliate by joining an affiliate program, choosing the offers you want to promote on your website, obtaining a unique link or code, and sharing it on your website. Check out some of the best affiliate programs if you are a beginner.
Step 5: Choose in-demand products from stores having affiliate programs
When choosing affiliate programs, ensure the products appeal to your customer base and are in demand. For instance, if you have a sportswear website, you can select products that are in demand for customers who are into fitness. Here, you must concentrate on products like fitness trackers or equipment.
Step 6: Compare product prices across multiple stores
Finally, it’s time to compare product prices across stores to give your customers a bird-eye view of the comparison. Make sure that you select reliable websites or stores when you recommend them. A relationship based on trust will go a long way in developing a loyal customer base.
Step 7: Promote your website
Traffic is the number one thing that will determine the success of your website.
You can advertise on social media platforms like Facebook and Instagram to get more traffic. You can also pay for advertising using Google Adwords or bidding for specific coupon keywords to help maximize your reach.
Conclusion
Price comparison websites are an effective customer acquisition channel for new platforms, as they allow users to discover their platform and get discounts/offers that are ideal for propelling them to purchase.
Price comparison website development is not easy, but once all the processes are set and optimized, it creates an effective income source for your business. You can use ClipMyDeals’ comparison plugins to make the process easier and launch your own website in a few easy steps.