Frequently Asked Questions
How to check postback success/failure in Postback Logs
With this feature in our cashback plugin, you can now find the reason why your postback URL failed.
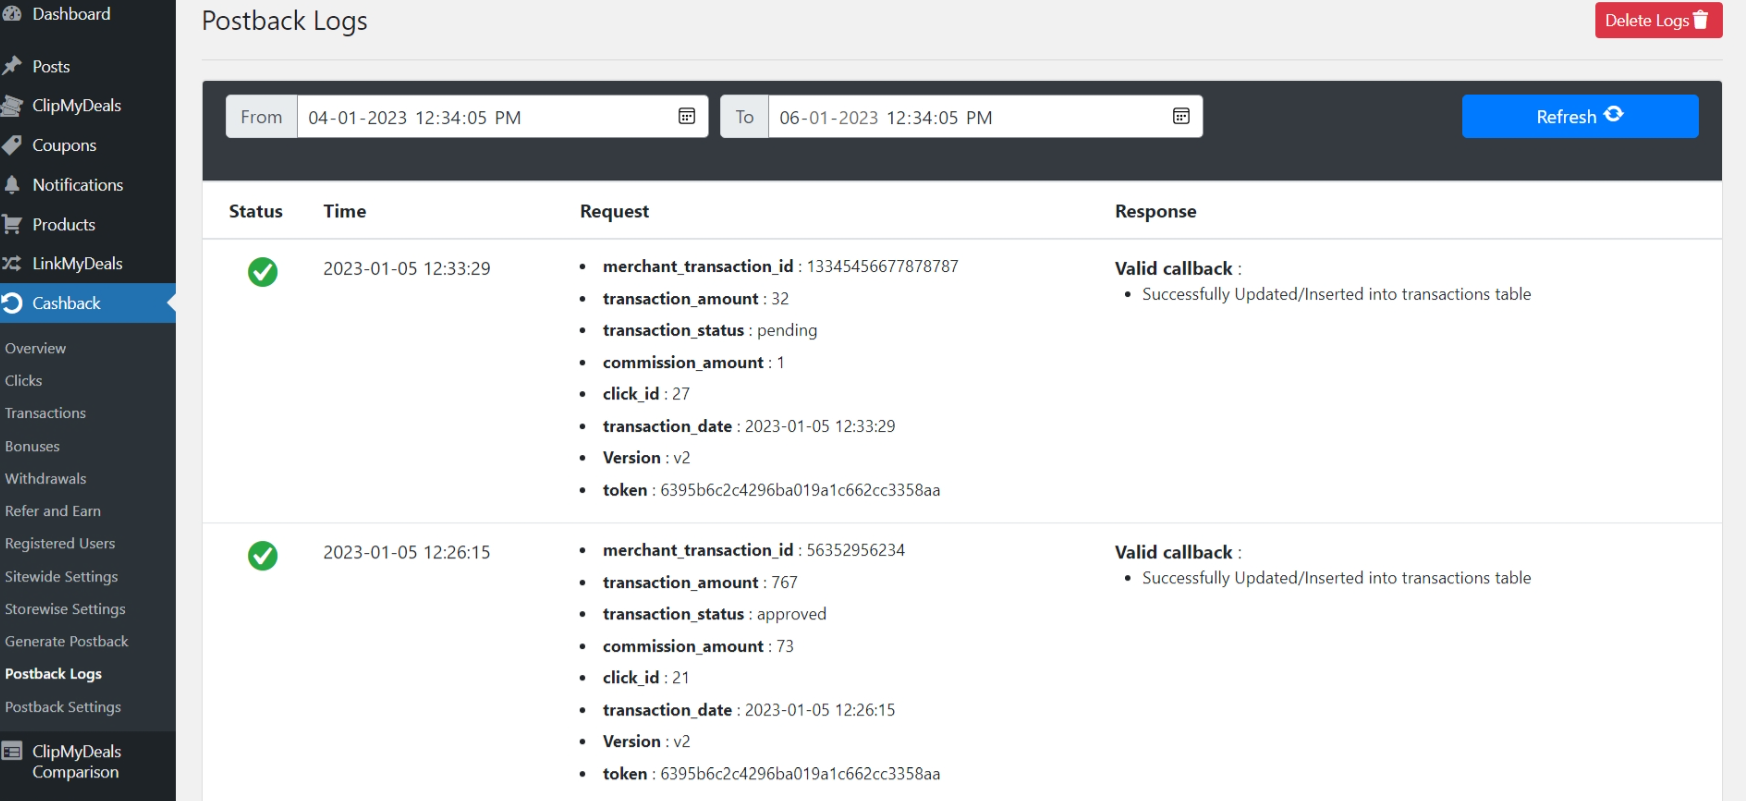
Go to your Admin Panel > Cashback > Postback logs
You can set a range From DD-MM-YYY HH-MM-SS To DD-MM-YYY HH-MM-SS. You can choose to type the details or choose the date and time from the calendar in the corner. Now click on Refresh, all the details of the transaction will be listed below in a tabular format
Now, you will get a pop-up to select the number of days for which you want to delete the postback logs
Eg - To delete all postback logs give input '0' Day(s).
Eg - If you have selected 15 Days, it will delete all Postback Logs older than 15 Days
Then click on Delete. Once this action is performed, the data will be deleted permanently from your logs
Go to your Admin Panel > Cashback > Postback logs
You can set a range From DD-MM-YYY HH-MM-SS To DD-MM-YYY HH-MM-SS. You can choose to type the details or choose the date and time from the calendar in the corner. Now click on Refresh, all the details of the transaction will be listed below in a tabular format
- Status – Red indicates failure. Green indicates success
- Time – This is the exact date and time the postback was launched
- Request – It shows all the parameters that were requested in the postback URL. Screenshot attached below shows the parameters for Admitad Postback
http://example.com/wp-json/cashback/v1/postTransaction/?click_id=[[[subid]]]&merchant_transaction_id=[[[order_id]]]&transaction_amount=[[[order_sum]]]&commission_amount=[[[payment_sum]]]&transaction_date=[[[time]]]&&token=f0955f01c507a8210d80c2b3abf469b7 - Response – It shows the exact reason why the postback URL failed.
Now, you will get a pop-up to select the number of days for which you want to delete the postback logs
Eg - To delete all postback logs give input '0' Day(s).
Eg - If you have selected 15 Days, it will delete all Postback Logs older than 15 Days
Then click on Delete. Once this action is performed, the data will be deleted permanently from your logs
Last Updated 3 years ago