Frequently Asked Questions
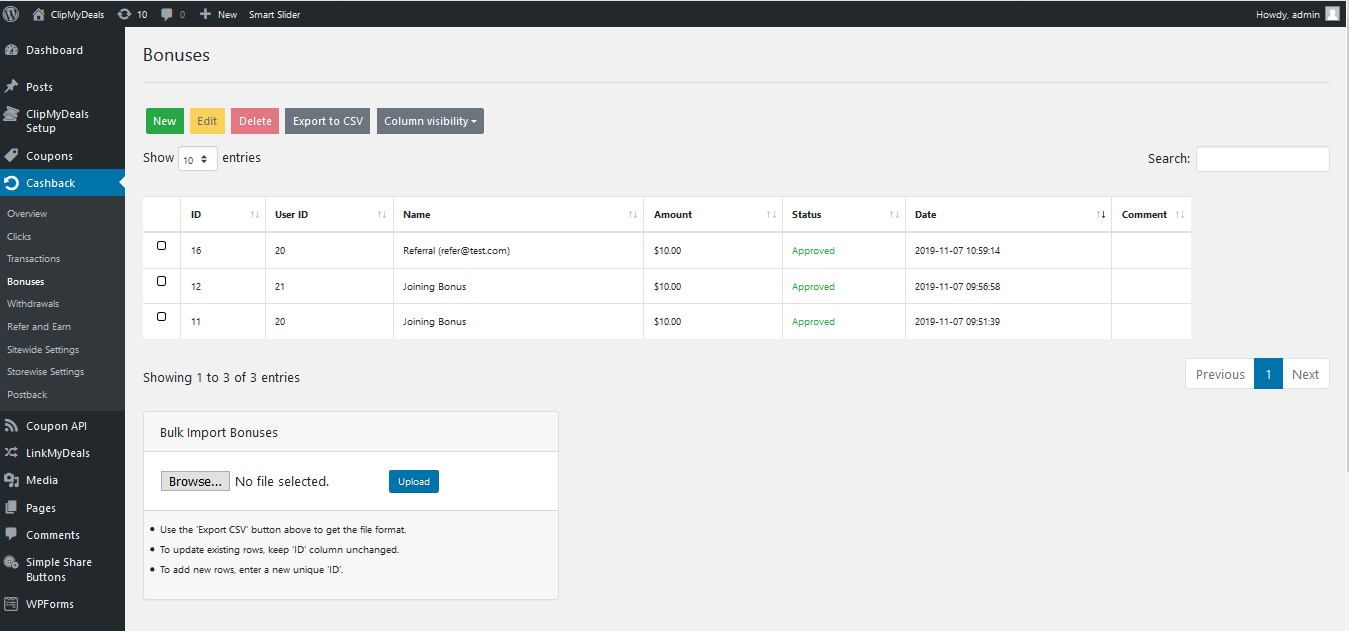
Bonus Panel
In bonus panel you can see the list of User ID who got the joining Bonus and referral Bonus.
Manually Uploading Bonus Record
Adding Single Bonus Record
You can add bonus to the table by clicking on the "New" button on Bonus Panel of the Cashback plugin.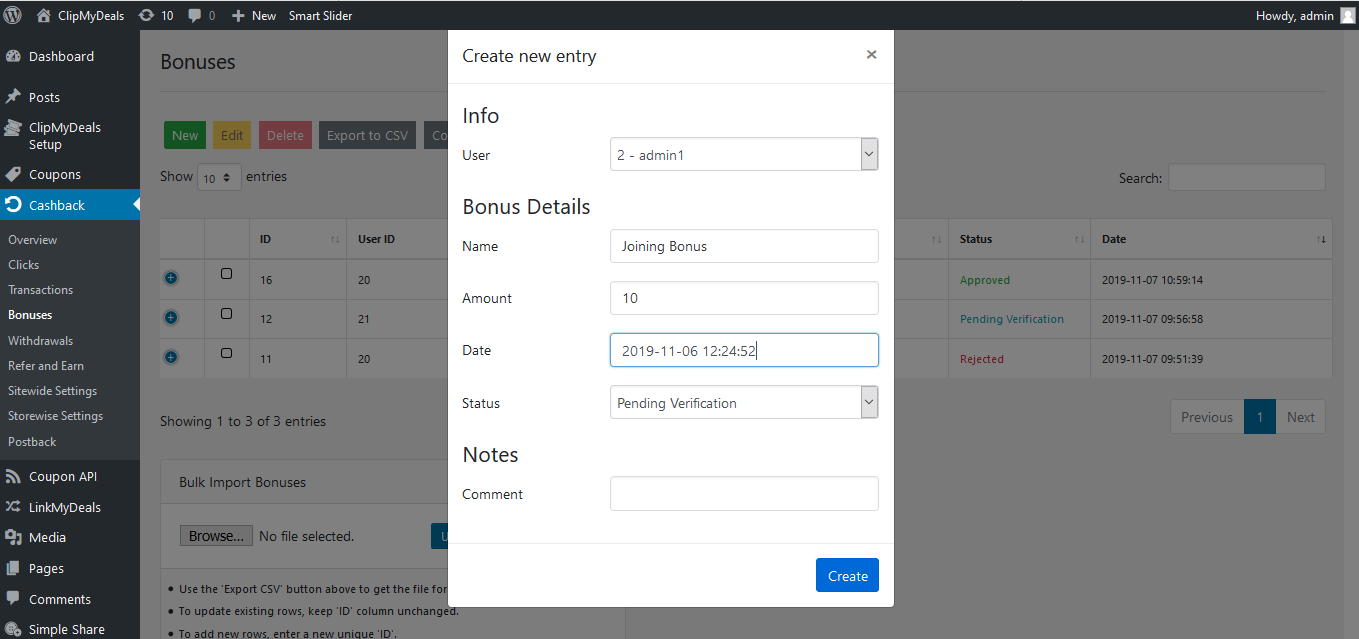
The fields are as below:
- User: The User ID of the registered subscriber of your site.
- Name: The type of bonus you want to give to user i.e. Joining Bonus, Referral Bonus or any other customized bonus.
- Amount: The bonus amount of given to subscribers.
- Date: The date & time when this record occurred. Default date format is YYYY-MM-DD hh:mm:ss. Eg:2019-11-05 11:54:06
- Status: This can be either of 3 values as below:
- pending - The bonus amount is confirmed, but it has not been paid yet to the user.
- approved - The bonus amount is confirmed and has been paid yet to the user.
- rejected - The bonus amount is rejected due to violation of one or more T&Cs of your website.
- Comments: Any notes/comments for the user to better explain the status of Bonus.
Bulk Upload Format
There are hundreds and thousands of affiliate programs in the world. So it is not possible for us to support CSV formats from each of them. Instead, we stick to one basic CSV format. With a bit of MS-Excel / CSV skills, you should easily be able to reorder & rename columns as per our standard format. You can export the bonus table to get a sample CSV file.Use the Bulk Import block below the bonus table to upload your file. Records with repeating ID or will get updated. All other records will be inserted as new rows in the table.
Editing records in Bonus table
Editing a single row from the Bonus table
To edit a single row, you can click on the row to select it. Then click on the "Edit" button at top of the table to open a popup for editing. Editing a single row is very straight-forward. You simply need to update the values of each field with new data or keep the data unchanged. Then click on the "Save" button.Editing multiple rows
Selecting rows that are in a sequence
Click on the first row in the series. Now press the "Shift" key on your keyboard and click your mouse on the last row of the series that you want to edit. This way, you will get a sequential selection.Selecting random rows of the table
Press and hold the "Ctrl" button of your keyboard, and using the mouse, go on clicking the rows that you want to edit. This way, you would have a selection of different rows.Assigning values to fields with different data on each row
When you do a multi-selection, any value given to a field will get assigned to each selected row of the table. If you do not want to change the values for that field, you can leave it changed. If you changed any field's value and would want to revert to existing individual values, then you can click on "Undo Changes" button under the field.Column Visibility
You can set the column visibility by selecting the fields under Column Visibility.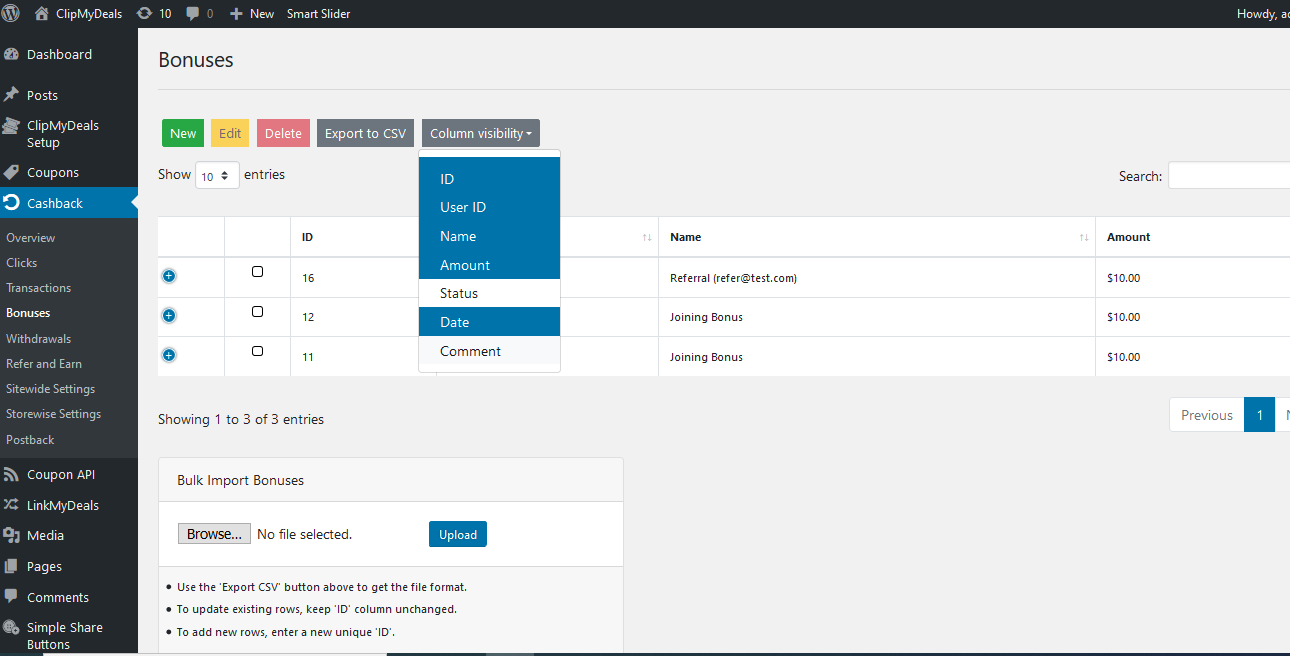
Last Updated 5 years ago